In our previous blog, we learned the installation of Homebrew’s httpd Server. Now we will learn how to setup of the brew httpd server for the local development process? Why Local development setup is important? Every developer understands the benefit of a local development Server. It allows us to test our project before uploading it to a Live server.
What will we learn in this blog? In this blog, we will do some required changes in configuration. Every developer with multiple projects. Virtualhost setting will help us to setup it up.
Change Port
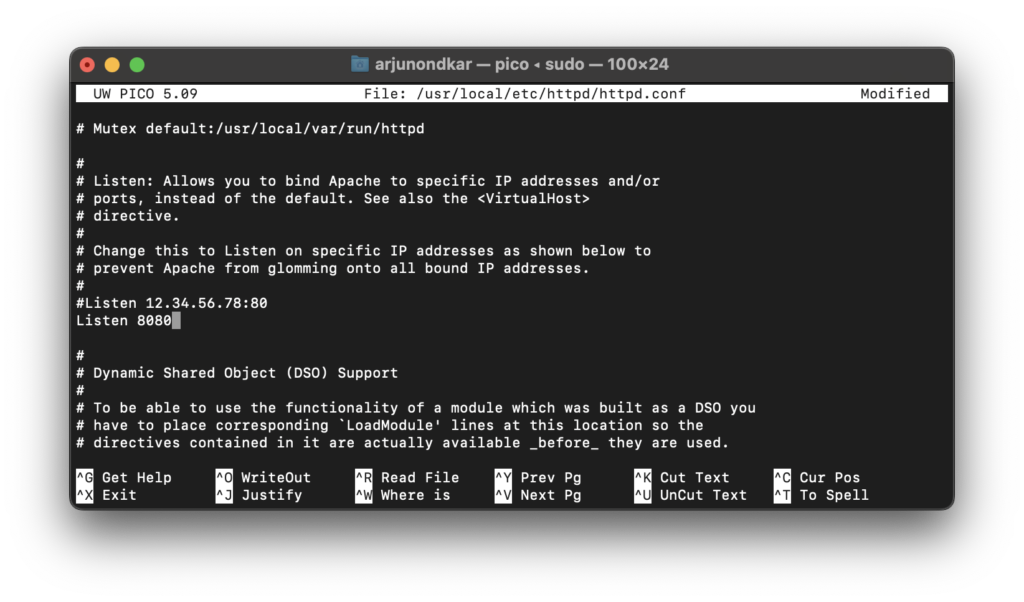
Now time to do some basic but important changes in our Apache. These changes will help us in the development process. We already discussed in our last blog that by default brew’s apache listens for an 8080 port. Our first step will be to change it to port 80. It is not required, you can run your website on port 8080 too.
Port 80 is registered as the default port and Port 8080 is the alternative port for HTTP services. Ports can be from 0 – 65353 but Ports 0 to 1023 are reserved or well-known ports. 1024 to 49151 are registered ports. The private port range is 49152 to 65353.
$ sudo nano /usr/local/etc/httpd/httpd.conf
Change DocumentRoot and Enable
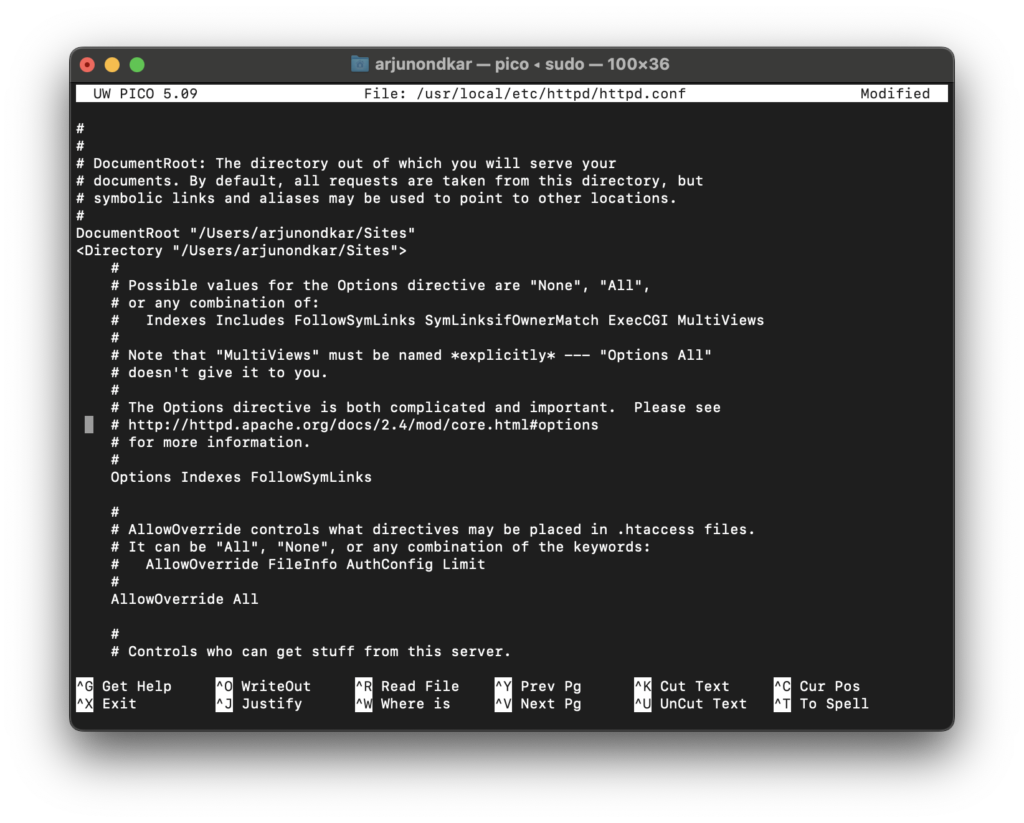
What is “DocumentRoot”? DocumentRoot is the folder where Apache Server will search for web files. By default root path is “/usr/local/var/www”. Changing the document root is not necessary. If you want to follow best practices then it must be in your home directory. Create a parent folder for your project.
$ mkdir /Users/<YOUR_USERNAME>/SitesNow edit httpd.conf file to change DocumentRoot.
$ sudo nano /usr/local/etc/httpd/httpd.confSearch the “DocumentRoot” term in httpd.conf file and change the path to “/Users/<YOUR_USERNAME>/Sites”. We also need to change the folder path in the Directory tag just below your DocumentRoot line.

Now search “mod_rewrite”. By default, this line is commented, uncomment it by removing #. It will enable URL rewrite on Apache.
LoadModule rewrite_module lib/httpd/modules/mod_rewrite.soPermission to brew httpd server
We have changed the path of “DocumentRoot” to the project folder in your home directory. Now Apache will face a permission issue when accessing web files. By default Apache runs as the User “_www” and Group “_www”. We will change “User _www” to “User <YOUR_USERNAME> and “Group _www” to “Group staff”, this setting will enable access to files from the new home directory.
Create a Site Folder and ServerName
First, we will change our ServerName. By default ServerName is disabled. It is recommended to change it. Search ServerName in httpd.conf file and set it to “localhost” or anything else you want.
We will create a “Sites” folder in our home directory where we will create our multiple projects. We can create through a terminal or in Finder. Create a simple HTML page with some content in this folder. Remember the path must be the same as we set in DocumentRoot.
$ mkdir ~/Sites

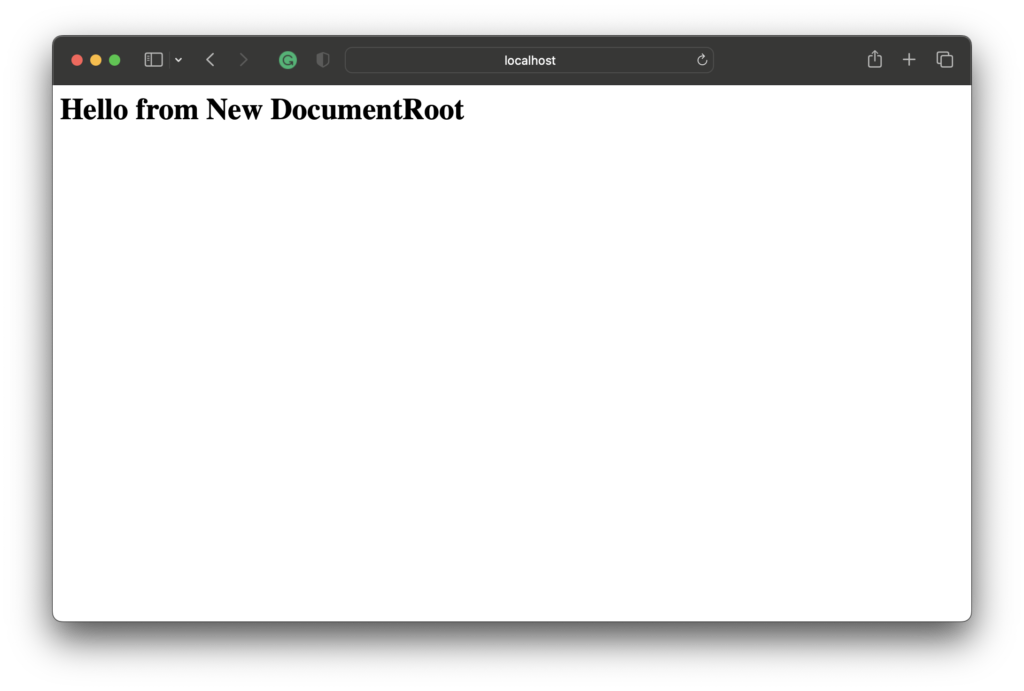
$ echo "<h1>Hello from New Document Root</h1>" > ~/Sites/index.html
Now to get the changes in effect, we will restart the server.
$ brew services stop httpd
$ brew services start httpd
After the server restart, open http://localhost and should see a page from the site folder.

Setup Virtualhost
As a developer, we worked on multiple web projects. We create multiple projects and each project needs a separate URL or Local Domain. Another point is we can not keep all project files in a single folder like “Sites”. Just like the Local domain or URL, we also need a separate folder for every project. Virtaulhost will help us to setup it up. It allows us to create and maintain a proper folder structure.
Sites/
|----| website_one/
|----|---public_html/
|----|---logs/
|
|----| website_two/
|----|---public_html/
|----|---logs/
Let’s create two local domains for our projects i.e website_one.lan and website_two.lan. You can change your name according to your real project name. We are using .lan but not .com to refer to a project on local setup. Every local domain will assign a different project folder. Our details will be as follows.
Local Domain: websiteone.lan
Server Name: websiteone.lan
Document Root: ~/Sites/website_one/public_html
Local Domain: websitetwo.lan
Server Name: Websitetwo.lan
Document Root: ~/Sites/website_two/public_html
Enable Virtualhost
Open httpd.conf file and search “vhost_alias_module” and uncomment line by removing #.
#LoadModule vhost_alias_module lib/httpd/modules/mod_vhost_alias.soSearch another module “Virtual hosts” and uncomment this line too.
#Include /usr/local/etc/httpd/extra/httpd-vhosts.confSetup Local Domain And Document Root.
Time to set up our local domain and document root for each project. Here we have created two projects so let’s define it configuration file. For that, we need to edit httpd_vhost.conf file. In the file, you can find a virtualhost example. We will comment existing code and will re-write the new setting as follows.
$ sudo nano /usr/local/etc/httpd/extra/httpd-vhosts.conf

#New Setting

<VirtualHost *:80>
  DocumentRoot "/Users/<YOUR_USERNAME>/Sites/website_one/public_html"
  ServerName websiteone.lan
  ErrorLog "/Users/<YOUR_USERNAME>/Sites/website_one/logs/error_log"
  CustomLog "/Users/<YOUR_USERNAME>/Sites/website_one/logs/access_log" common
</VirtualHost>

<VirtualHost *:80>
 DocumentRoot "/Users/<YOUR_USERNAME>/Sites/website_two/public_html"
 ServerName websitetwo.lan
 ErrorLog "/Users/<YOUR_USERNAME>/Sites/website_two/logs/error_log"
 CustomLog "/Users/<YOUR_USERNAME>/Sites/website_two/logs/access_log" common
</VirtualHost>
Custom Virtual host File
One day your httpd_vhost.conf file will look messed up with multiple project settings. It happens with every developer when working for a long time. Need to find a solution to it. So what will we do? The solution is simple, create a separate vhost file for each project and saved it in the respective folder.
Let’s create another project called websitethree.lan. Follow the folder structure of website_one. Create an index file with the content “Hello from website Three”. To save time, make a copy of httpd-vhost.conf file and save it in “~/Sites/website_three/” folder. change all values accordingly as Setup Local Domain And Document Root.
To work our setup properly, we need to tell server where our new vhost file is located. Now edit our original httpd-vhosts.conf file and add following line it.
$ sudo nano /usr/local/etc/httpd/extra/httpd-vhosts.conf

#Custom virtual host file path

IncludeOptional /Users/<YOUR_USERNAME>/Sites/*/httpd-vhosts.conf
In above line * will instruct service to search vhost file into every folder under Sites directory. Don’t forget to add a project details to your host file and then restart Apache.
Check Configuration Syntax
We have made the changes in server configuration file. It is best practice to test for any syntax errors before restarting the server. Use the following command to check syntax. If there are any errors, the command response will display in details.
$ sudo apachectl -t

Response

Syntax OK
Change host File.
Now time to change host file. We need to enter our Servername in host file.
$ sudo nano /etc/hosts

#Add Local Domain name / Project URL
127.0.0.1	websiteone.lan
127.0.0.1	websitetwo.lan
127.0.0.1	websitethree.lan
Create an HTML file for every project.
$ echo "<h1>Hello from Web Site One</h1>" > ~/Sites/website_one/public_html/index.html

echo "<h1>Hello from Web Site two</h1>" > ~/Sites/website_two/public_html/index.html
Now restart apache and check our project URLs i.e. websiteone.lan, websitetwo.lan and websitethree.lan


