Configuring Local Website on a local development setup is very important in the development process. The local setup allows you to test your new idea, development process, design, concept, themes and plugins ( WordPress ). It helped the developer to test the website before uploading it to the production server. We can work on the local website without internet connections, so the performance of the website is also not limited by internet connection speed. Working with a live server is a very time taking process. The developer needs to upload files on the server to test it. But working on local setup is faster as you are exchanging information within your computer.
Configure Local Website
To set up a local website we need a web server to process our web requests. We will call it Local Server. Enabling localhost, your local computer turn in the server. You will need to download and install the software. We are working on Ubuntu, and need to initialize The Apache is one of the leading web servers ( Feb 2020 serve: 37.47% ) and the favourite way to host web content on the Internet. It is very flexible and loaded with other useful features. In this small tutorial, we will see How To Configure the website on a local machine.
Install Apache
So Apache is open source web server and is available in Ubuntu’s default repositories. So let’s update the local package index to get the updated package.
$ sudo apt-get updateLet’s Install the apache2 package
$ sudo apt-get install apache2 Check whether Apache is running or not with the following command.
$ sudo systemctl status apache2 Output
apache2.service - The Apache HTTP Server
Loaded: loaded (/lib/systemd/system/apache2.service; enabled; vendor preset: enabled)
Active: active (running) since Sat 2020-05-30 10:53:41 IST; 1 weeks 1 days ago
Docs: https://httpd.apache.org/docs/2.4/
Main PID: 1386 (apache2)
Tasks: 11 (limit: 9377)
Memory: 30.6M
CGroup: /system.slice/apache2.service
├─ 1386 /usr/sbin/apache2 -k start
├─116040 /usr/sbin/apache2 -k start
├─116041 /usr/sbin/apache2 -k start
├─116043 /usr/sbin/apache2 -k start
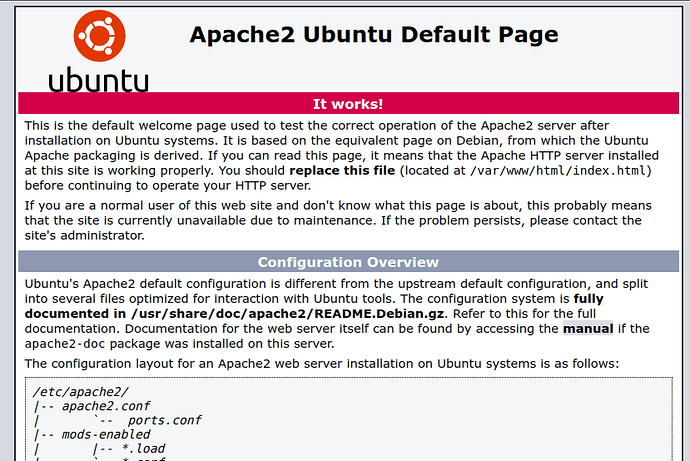
├─116044 /usr/sbin/apache2 -k startApache comes with a basic default website. Now check it in your browser http://local_server_ip


Setup Virtual Host
Let’s set up our local website using Apache Virtual Host. We can configure multiple websites under different domains. We are using my_website part, for example, you will replace it with your domain.
Create a Directory structure to save all required pages of our websites. So we are creating my_website ( Replace it with your domain or website name ) folder in apache default root folder /var/www/my_website
$ sudo mkdir -p /var/www/html/my_website/public_htmlLet give access to non-root users to modify, delete and create files in working folders
$ sudo chown -R $USER:$USER /var/www/html/my_website/public_htmlWe also give read and execute permission to the parent folder so the website will work properly.
$ sudo chmod -R 755 /var/wwwIn the next step, we create an Apache conf file for the website. This file carries important details like folder path – Document root, Domain / Server Name, and other details. Apache comes with a default conf file 000-default.conf in /etc/apache2/sites-available/ We will make a copy of the default file and will change the details according to our requirements.
$ sudo cp /etc/apache2/sites-available/000-default.conf /etc/apache2/sites-available/my_website.confWrite the following command to Edit my_website.conf to change details.
$ sudo nano /etc/apache2/sites-available/my_website.conf<VirtualHost *:80>
ServerAdmin admin@mywebsite.com
ServerName mywebsite.com
ServerAlias www.mywebsite.com
DocumentRoot /var/www/html/my_website/public_html
ErrorLog ${APACHE_LOG_DIR}/error.log
CustomLog ${APACHE_LOG_DIR}/access.log combined
</VirtualHost>Save and close the .conf file, Enable it and check the configuration error for any syntax errors.
$ sudo a2ensite my_website.conf - ( Enable Config )

$ sudo apache2ctl configtest - ( Check Error )

Output: Syntax OK
To access our website, we will set up a custom domain in the hosts file under /etc/hosts
$ sudo nano /etc/hostsNow Enter the following record in the hosts file, Save, and Exit. We used the local custom domain name ( ServerName ) in my_website.conf. Restart apache2 to work it properly.
127.0.1.1 mywebsite.com
$ sudo systemctl restart apache2So We hope you follow all steps properly and access your website correctly. Now we have a web server, host, and test your content developed in different web technologies before uploading to production servers.


