Table of Contents
If you are a new Apple user and do not know macOS screenshot shortcuts then you must read it. In our daily work life taking screenshots is an essential task. So many times we are required to take screenshots of our imp email or reports or travel tickets. So let’s see how we can take screenshots with keyboard shortcuts on macOS.
macOS Screenshot Shortcuts
Generally, macOS provides three keyboard shortcuts to take screenshots. You will have the 4th way If you have a Macbook Pro with a touch bar. The touch bar makes it very easy to select the type of screenshots. Let’s learn about it.
Shift + Command + 3 ( Full Screen )
To capture the entire screen, please press and hold these three keys.

Shift + Command + 4 ( Capture a portion of the screen )
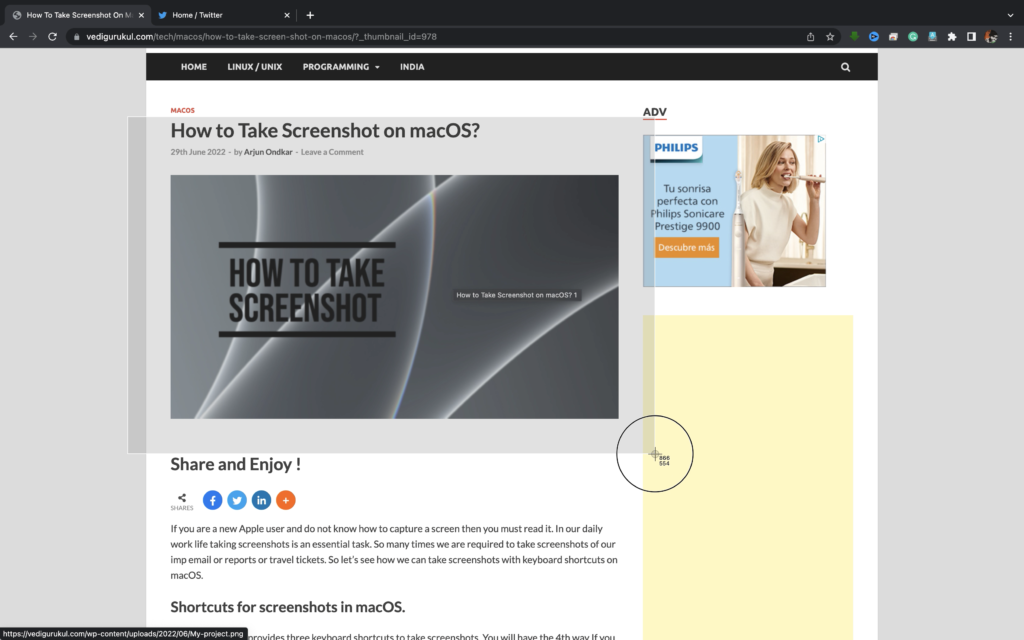
To start capturing, press and hold the above three keys. Your pointer will turn to a crosshair to select the area on the screen. Drag the crosshair to select the area of the screen and release the mouse button or trackpad whenever you want to take a screenshot.

Shift + Command + 4 + Press and Release Space Bar ( Capture Window / Menu )
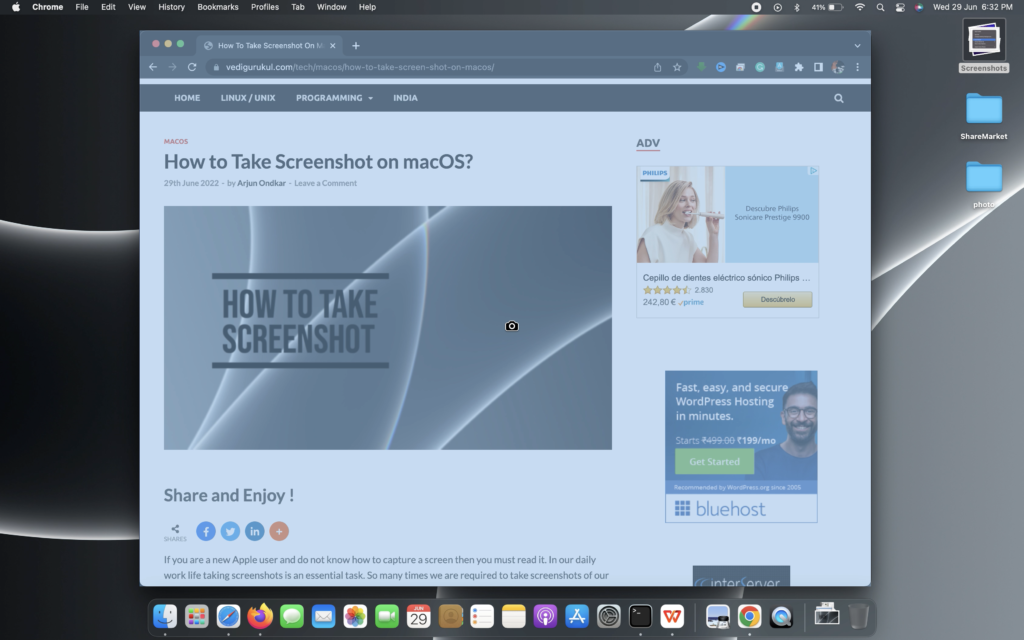
When we want to take a screenshot of the window or any menu, press and hold Shift + Command + 4 keys, then press the space bar. Your cursor will turn to the camera icon. Move the cursor on the window or on the menu which you want to capture. You will see that window or menu becomes highlighted in blue. Release the mouse button or trackpad whenever you want to take a screenshot.

Shift + Command + 4 + Press and Hold Space Bar.
We select an area on the screen to capture and sometimes we notice the selection area is a little bit off by some pixels. Holding the spacebar will lock the shape and size of the selection and also allow you to re-position it on the screen.
Shift + Command + 4 + Esc.
If you are dissatisfied with the capture area so before releasing the mouse button or trackpad, press Escape ( Esc.) to exit selection.
Shift + Command + 5
In macOS Mojave (2018) Apple introduced a virtual panel at the bottom of your display with all screen capture and recording options. Three screenshots buttons allow you to capture the entire screen, a window and a selected area. The panel also provide video recording options which can record either the entire screen or a selected area of the screen.
On the right-hand side, you will find the “Options” button that provides you with various options for choosing where you want to save your screenshots and video clips. You can set a timed delay so you can prepare your screen to capture or record. After taking a screenshot it showed you a thumbnail preview of the captured screen or recording clip on the lower right side of your screen. To modify and share screenshots, click the thumbnail. You can turn off the thumbnail preview by de-selecting the “show floating thumbnail” option. If you don’t want the mouse pointer in a screenshot or recorded clips then you disabled it.
Where do you find screenshots?
By default, screenshots are saved to your desktop with the naming convention as “Screenshot YYYY-MM-DD at HH.MM.SS PM ( macOS Monterey ). The file name will help you to know when you took a screenshot. If you are using macOS Mojave and later, then you can use Desktop Stacks. Desktop Stacks will be tidied away into a folder.
To enable Desktop Stacks, go to your desktop choose view > select Use Stacks Or Use the keyboard shortcut Control + Command + 0. You can do control+Click the desktop then choose “Use Stacks”.
How to change the screenshot location?
If you have macOS Mojave (2018) or later then it is very easy for you to change location. Use the keyboard shortcut key ie. Command + Shift + 5 >> Options >> Select folders that are listed OR choose a location.
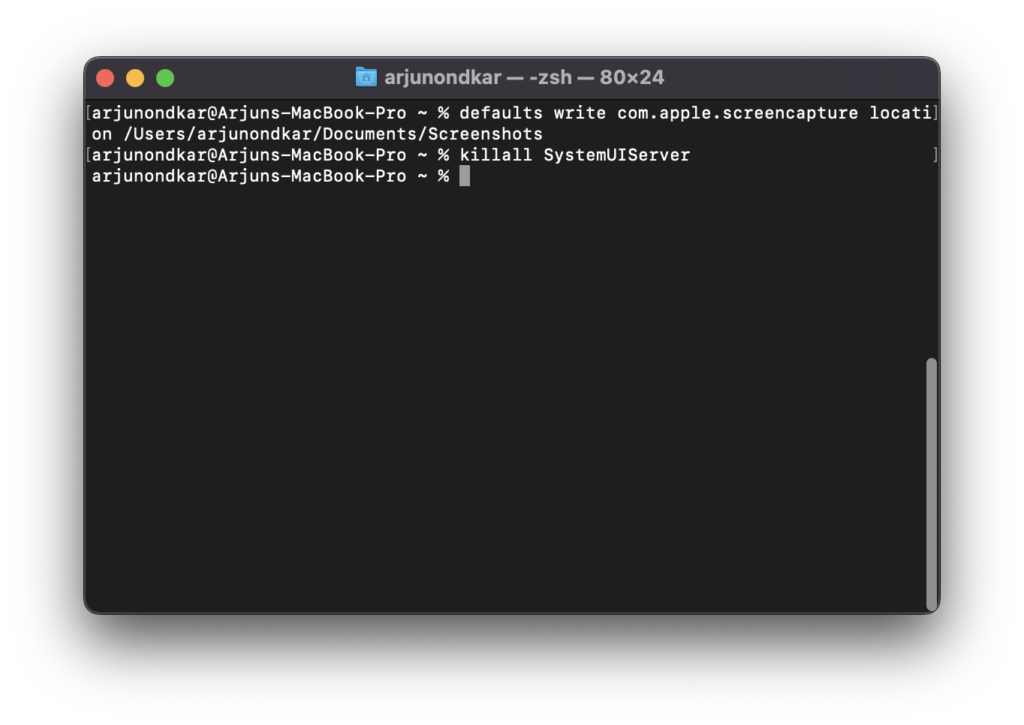
Now Pre-Mojave users may feel a little difficult to change location to save screenshots. Let’s start creating the folder named “Screenshots” in our Document folder. Now open Terminal and type the following command to change location.
: defaults write com.apple.screencapture location < Folder Path of new folder >
: killall SystemUIServer
: defaults write com.apple.screencapture location /Users/arjunondkar/Documents/Screenshots
Note
- There needs to be space between the location and folder path otherwise it will give you an error.
- You can drag and drop your screenshots folder on the Terminal window, it will automatically capture the folder path.
- Don’t delete the folder you created.
- If you want easy access to your new folder. Please create a folder Alias later and drag and drop the alias to the desktop.
Please check how to start Python on macOS
If you need more help, please visit the Mackbook Pro Support Website


